I am re-posting one of my favorite home made bread recipes. There is nothing better than fresh bread and a cup of soup on a cold day.
It's been a long time since I felt like baking. Too many sweets and too much flour over the holidays can do that to you. But, there is nothing better on a cold, snowy, Wisconsin winter day than the smell of bread baking in the oven. Especially the Frugal Gourmet's Italian Peasant Bread, it's my favorite. My family loves it too, I believe one of the best compliments I have ever gotten was "Gee Mom, it looks like REAL bread!".
It takes a little time but is definitely worth the effort. All you need are a few simple ingredients....
Flour ( I prefer the all natural unbleached, all-purpose. You can also use bread flour.), Salt and yeast (I buy it in bulk, hence the odd container.)
Step one is to proof 2 packages of yeast (or 4 1/2 tsp. if you use bulk yeast) in 2 1/2 cups warm water for about 5 minutes. Then add 4 cups of flour and mix well.
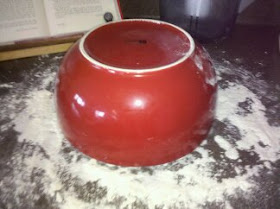
The dough should hold together and pull away from the edge of the bowl.
Then dissolve 1 tsp. salt in 1 Tbsp. water, and add to the dough. Mix again.
A Kitchen Aid Mixer comes in very handy mixing bread dough, but I have discovered that the bread actually tastes better and has a lighter texture when mixed by hand. I used a mixer for many years, but after the third Kitchen Aid that I owned went to the graveyard, I discovered that I didn't really miss it. I also feel that using metal bowls or spoons seems to affect the taste and texture of the dough. I prefer plastic spoons, and glass bowls, but this could just be my over active imagination.
Add the last 2 1/2 cups of flour (you should use about 6 1/2 cups total). Mix again. It's at this point the dough becomes difficult to handle, so I mix it a bit in the bowl, then dump it on the counter and mix and kneed by hand for 15 minutes.
Kneading dough is a wonderful way to work out all your frustrations. I find it very relaxing.
Work as much of the flour in as possible, you may want to add a bit more water for a more elastic dough.
When the dough is ready it will look smooth and make a nice ball. Then just leave it on the counter or put it on a piece of plastic wrap with a bowl over the top to rise.
Let it sit 1 to 2 hours until doubled in bulk.
This is a very scientific process: you punch, pull, and punch some more til the dough looks, well, doughy.
After the second rising, it will look full and dense.
Time to shape it into loaves. This recipe makes 2-3 loaves. You can make French style loaves or round Italian ones.
I like the French style. I also slice the top of the bread in several places for visual effect.
I use a baking stone to cook my bread on, you can also use a cookie sheet. Sprinkle the pan lightly with cornmeal to keep the bread from sticking.
Place the bread in a preheated oven at 450 degrees. Cook the bread in the top 1/3 of the oven, and place a shallow pan of boiling water under the bread. This creates a great crust. Cook for 25 minutes.
After cooling, slice and serve with your favorite olive oil blend, dip it in wine, or slather it with butter. Anyway you serve it, it's divine.
Designer Mom


No comments:
Post a Comment