

Here we are for day three of my Renaissance Costume Tutorial! Today's project is the skirt!

I am featuring Simplicity Pattern #3809, view A (on the left).

Have all your supplies on hand for this project including the trim for the hem. I made my own trim by layering two ribbons together and topstitching them with a decorative vine stitch. This is the same trim that I used on the bows of the sleeves for the Chemise.
You can read about how I made the Chemise here.
Some Tips:
I used 1 1/2" elastic for the skirt waist instead of having a fitted waist band. I added 1" to the top of the pattern where the waist band would have been sewn. If you go this route, please be aware the pattern needs to be straighter at the top and side seam to accommodate the sewing of the elastic, it will not be as curved as for an inset waistband.
Also, I did not use a zipper for the skirt. I cut the back piece on the fold of the fabric where the zipper would have been instead.
I shortened the hem by about 1". Generally speaking, the longer the skirt, the narrower the hem should be. A small rolled hem is much better and takes much less time than the wide hem allowed on the pattern. In fact, you could just serge the hem, this is a costume after all. No one will notice what your hem width really is. I have seen costumes at the Renaissance Faire that aren't hemmed at all and I thought they looked very appropriate.
There is a mistake in the cutting layout on the manufacture's directions for View A. It reads to "cut 3" panels for the skirt. Even if you use a zipper you only need two panels (front and back) for view A. Three panels are needed for view B, not for view A.
I do not use the pattern instructions, but have my own method of construction. Here's how it works:
Step One:
Sew the left skirt side seam together. Overcast edges if you wish, but this is not generally necessary for a costume.
Turn down the top of the skirt waistband 1/4 and stitch. Use your presser foot as a guide instead of using pins.

Step Two:
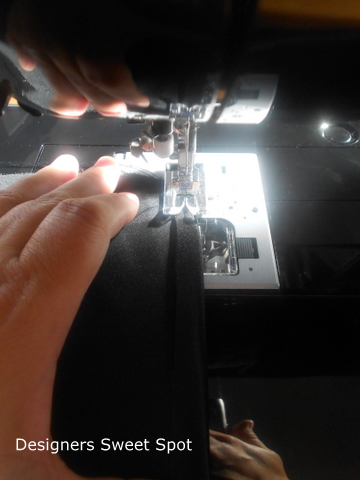
Cut elastic to fit your waist. Anchor the end of the elastic at the side seam with a few single needle stitches. PULL the elastic as hard as you can while you sew in the middle of it, all the way over to the other side seam. The elastic should stretch the entire length. The fabric will be naturally gathered underneath the sewing needle by the feed dog. This photo above shows the back of the waistband elastic.

Step Three:
Using a zig-zag stitch or stretch elastic stitch, sew two rows on either side of your first stitching. This will evenly space the gathers and be very durable. You will not have to re-stretch the elastic at this time.

This is what it will look like when finished. Sorry about the poor photo, who knew photographing black satin would be so hard?

Step Four:
Make a rolled hem on the skirt by turning over 1/4" and stitching with a single needle stitch.

Roll the hem again and stitch on top of your first line of stitching.

Step Five:
Sew the trim to the skirt using a single needle topstitch. Do not pin the trim to the skirt if you are using satin or taffetta, pins can cause snags very easily. Instead, measure the distance from the trim to the hem as you sew. Mine was 12" from the hem. Sew a few stitches, measure correct placement, then sew a bit more. It gets easier with practice, you can do it!
Step Six:
Sew the remaining side seam, tacking top and bottom edges. Overcast remaining edges if you wish.

That's all folks! Tomorrow we tackle the Corset! See you then!
No comments:
Post a Comment