Hi all! We are back from a few restful days of much needed vacation! I have lots to share with all of you, but first I realized I forgot to finish this post before we left town, so here it is!
Recently, I had commented how I was having trouble coming inside to get things done around the house because it is just too beautiful outside. Perhaps you have the same problem. I seem to be addicted to the outdoors. For a long time I have wanted an Alfresco dining space, and at last we have one!
I found this beautiful table at a garage sale recently. It called to me. I was taken with it's clean lines and wide leaves. It's solid wood and can easily seat our family of six. Our indoor dining space is far to small to hold a table like this so I decided to use it outdoors instead.
I started with a coat of my favorite grey primer from Rustoleum. I had used it on my previous Trash to Treasure Tables project and loved it, but this time, I decided to add a different finish coat.
Earlier this spring, Clark and Kennsington was giving away a free sample quart of paint. I had to run right over to my local Ace Hardware and get one. I must say, it was hard to choose a color! There are so many beautiful shades to pick from! I ended up with a warm grey called Winter Chill. I find this amusing since winter chill is the last thing we will experience while dining alfresco in the summer time.
This is Winter Chill. Not to chilly is it? I love the neutral table with the bright red chairs. I am also addicted to red in case you haven't heard.
The humming birds often come and pay us a visit while we sit on the red chairs. Who knew this would be so effective?
This is our view of the yard. I can sit here and watch the corn grow for ridiculously long periods of time.
I lettered the words REST, RELAX AND REVIVE along the edges of the table just for fun. And to make my children ask questions. I can't help myself, I love messing with their minds.
After the table was painted, I printed out the words from the computer and gathered a few supplies. I used a straight edge, a sharpie pen, a compass (for the sharp end) and a piece of chalk.
First step was to color on the back of the paper behind the lettering with the chalk.
I added a faint guideline for the letters to sit on along the table edge, lined up the lettering and traced the edges with the pointed end of the compass through the paper. Our table is very hard wood. You may be able to just use a pencil if you are working with soft wood. In this case, the pencil didn't work so I used the compass. Then it was easy to trace the lettering with the black pen and fill it in. Well, relatively easy. I had to squint A LOT.
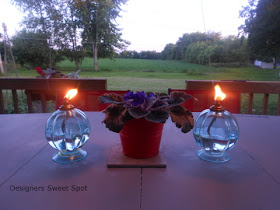
I added a coat of clear varnish over the top to finish it. This project was very inexpensive. I bought the table for $10.00 at a rummage sale, got the primer on sale, bought the varnish at Habitat for Humanity Store, and got the paint free. I saved money by not having to buy a stencil and using the chalk technique for the lettering. We already owned the chairs, and I love the colorful effect they have. The glass orb lanterns are also from the thrift store. At some point I would love to make some pillows and get an outdoor rug. For now, it feels very cozy under our awning when we dine outside.
I am feeling a wine and cheese night coming on!
I am posting this over on Hometalk today!
Linking up to Imparting Grace
Designer Mom


I like it...good paint choice. And your outside area looks inviting. Good job.
ReplyDelete